
200Mnu - Y.A.P.A.L.
Version 3.03 · David Becher
Description
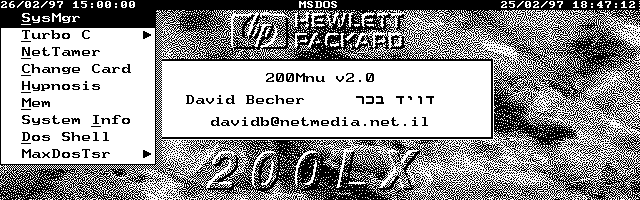
200Mnu - (Yet Another Palmtop Application Launcher) is a menu-driven application launcher for the HP 200LX requiring almost no memory overhead at all. The program displays a user defined menu on top of your Topcard allowing you to pick a program to run. Copyrighted freeware. Portions are copyright the PAL Group.
Technical details
- File
200mn303.zip- Size
- 61.2 KB
- Format
- .zip
- Year
- 2003
- Added to S.U.P.E.R.
- 2003-08-31
- Files inside
- 12
- Author
- David Becher
- Path
anonftp/pub/200mn303.zip
How to install it
What to send to the palmtop saves 56.0 KB
These are the files you need. You can send them from the package contents below.
-
200MNU.EXE→ A:\SOFT programa de DOS 65.1 KB -
200.COM→ A:\SOFT programa de DOS 92 B -
M.BAT→ A:\SOFT programa de DOS 153 B -
LXTCP1.BAT→ A:\SOFT programa de DOS 112 B -
M.ICN→ A:\SOFT icono, junto a su aplicación 200 B -
MAXDOS.ICN→ A:\SOFT icono, junto a su aplicación 200 B -
200MNU.INI→ A:\_DAT configuración 658 B -
LXTCP1.ICN→ A:\SOFT icono, junto a su aplicación 200 B -
LXTCP2.ICN→ A:\SOFT icono, junto a su aplicación 200 B
No need to put
200MNU.DOC, 200INI.DOC, 200MNU.PCX:
they are manuals, source code or supporting material. Read them here and save 56.0 KB on a 1 MB disk.
Steps
- Copy 200MNU.EXE, 200.COM, M.BAT, LXTCP1.BAT to A:\SOFT. They are DOS programs: run them from the DOS icon, or add A:\SOFT to the PATH in C:\AUTOEXEC.BAT to call them by name.
- Copy 200MNU.INI to A:\_DAT, where the 200LX looks for configuration. Open it with Memo and adjust it before use.
- If you edit a configuration file on the palmtop, make sure you leave a newline at the end: some programs swallow the last line without saying a word.
- The .ICN files are icons: they go in the same folder as their application.
Derived from the package contents and the 200LX conventions. It installs to A: on purpose: C: is a RAM disk and every byte there is memory taken from the system.
It also needs 7
The manual mentions these files, which are in the archive:
- CAPLX
CAPLX - FreeCell
FREECELL - Dominoes
DOMINOES - Klondike Solitaire
SOL - Golf Solitaire
GOLF - Tetris
TETRIS - SuperMaze
MAZE
The author's instructions
LxTcp &Setup = *
LxMta Catchup = lxmta catchup=1 nntp # a:\lxtcp # p c1

[Pnr]
PnrTi = pnrti # a:\lxtcp # p c1
Pnr.Exe = pnr.exe # a:\lxtcp # gg
Edit Pnr.cfg = a:\bin\qt.bat c:\_dat\pnr.cfg # c:\_dat

; I uncomment this section when I go overseas!
;[Dial &ISP]
;Thailand = *
;Australia=*
;Israel = *

[Dial &ISP]
;[Israel] change the section name when I go overseas
Local =dial.cmd lcl lcl # #c1
Netvision Tel Aviv = dial.cmd netvison netv1 # # c1
Netvision Petach Tikva = dial.cmd netvison netvpt # # c1
Netvision From Work = dial.cmd netvison netv2 # # c1
Netvision Alternate = dial.cmd netvison netva # # c1

[Thailand]
Asia Access/INET:Bangkok = dial.cmd asia asia # # c1
Internet Thailand:Bangkok = dial.cmd thai1 thai1# # c1
KSC of Thailand:Bangkok = dial.cmd thai2 thai2# # # c1

[Australia]
Connect Syd = dial.cmd connect connsyd # # c1
Connect Melb = dial.cmd connect connmelb # # c1
Telstra = dial.cmd telstra tmelb # # c1

[LxTcp &Debug]
Command Prompt = command.com # a:\lxtcp
LxMta Send = lxmta smtp  debug=1 # a:\lxtcp # c1
LxMta Recv = lxmta pop  debug=1 # a:\lxtcp # c1
LxTcpCfg =a:\lxtcp\lxtcpcfg # a:\lxtcp # c1
System &Info=si

[LxTcp &Setup]
&Modem Info = a:\hv\hv.exe a:\lxtcp\modemdoc\frconten.htm # a:\lxtcp\modemdoc # g
Edit Dial.bat =a:\bin\qt.bat a:\lxtcp\dial.bat
Edit Netv1.cmd =a:\bin\qt.bat a:\lxtcp\dial\netv1.cmd
Edit Netv Alternate cmd =a:\bin\qt.bat a:\lxtcp\dial\netv2.cmd
Edit Netvison.cfg = a:\bin\qt.bat a:\lxtcp\dial\netvison.cfg
Edit Wattcp.cfg = a:\bin\qt.bat a:\lxtcp\wattcp.cfg
Edit 200mnu.ini = a:\bin\qt.bat a:\200mnu.ini
Command Prompt = command.com #a:\lxtcp

[HtGet]
Bank of Montreal=htget -m -oa:\mbox\mrates.htm -v ww.bmo.com/economic/regular/fxrates.htm # a:\lxtcp
…
Literal excerpt from 200INI.DOC, exactly as it came in the package.
Package contents
Send to my palmtop
The palmtop must be waiting before you press the button, or the transfer will fail. It is the palmtop that announces it is ready, not the other way round.
Your browser cannot talk to the serial port. Direct sending uses the Web Serial API, which only exists in Chrome, Edge and Opera on desktop — not in Firefox, Safari or any mobile browser.
Download the file with the button above and copy it to the palmtop your usual way.